The Importance of Avalanche Education and Awareness
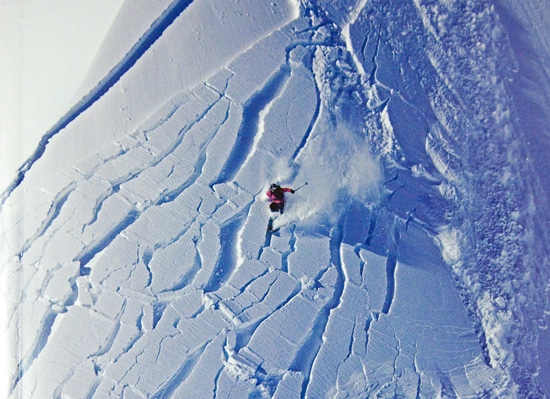
I didn’t think I would ever get caught in an avalanche. I bet the kid sitting next to me at the top of the 9990 Lift, just past the backcountry access gate outside of Park City Resort didn’t think so either.
He begins to crank down the straps on his snowboard. He’s ready to drop down hundreds of feet into fresh powder. Just before leaving the ridgeline, he turns to his buddy and says, “Hey, don’t let me die today bro.”
The good news- he made it down safely. We all did. The bad news:
- In 90% of avalanches, the victim or someone in the victim’s party triggers the avalanche.
- Most avalanche fatalities are highly skilled skiers or snowboarders between the ages of 18-40.
- Avalanches can occur on 30-45° slopes, so most ‘blues’ and all ‘black diamond’ slopes in a resort.
- Slopes that have already been skied can still avalanche.
- Avalanche victims buried under the snow and rescued within 15 minutes have 92% survival rate. This drops to 34% after 19-35 minutes under the snow.
Adventuring outside of the ski resort, even just beyond the gates or roped-off areas can be dangerous. Especially on days after a big snowstorm.
Why Avalanche Education is Needed for All
Avalanche education is all about risk management. Furthermore, with an increase in heli and cat ski operations, more powerful snowmobiles, and stronger storm cycles, it seems avalanches are becoming more common each season. In addition, accessing backcountry terrain from a resort and skiing just beyond the resort boundaries has become more popular.
Everyone wants fresh tracks. And the chance to capture it all on film and be a GoPro Hero or Insta famous? Yeah, that too. Therefore, getting educated about avalanches, managing your risk, and knowing how to stay safe is a smart move for all skiers and snowboarders, even those just out hiking in potential avalanche terrain!
Even if you never plan to leave the ski resort, inbound avalanches are rare, but they can occur. We’ve seen avalanches happen in or just adjacent to resorts like Snowbasin, Palisades Tahoe, Park City, and Alta. Therefore, having basic avalanche safety knowledge could help save you or someone in your ski party.
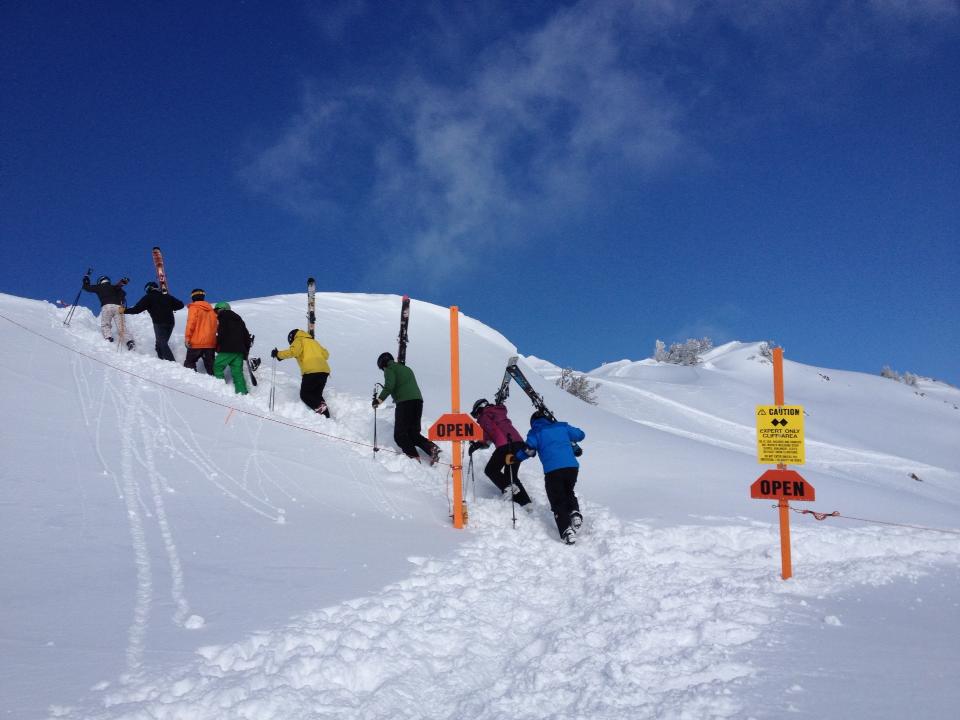
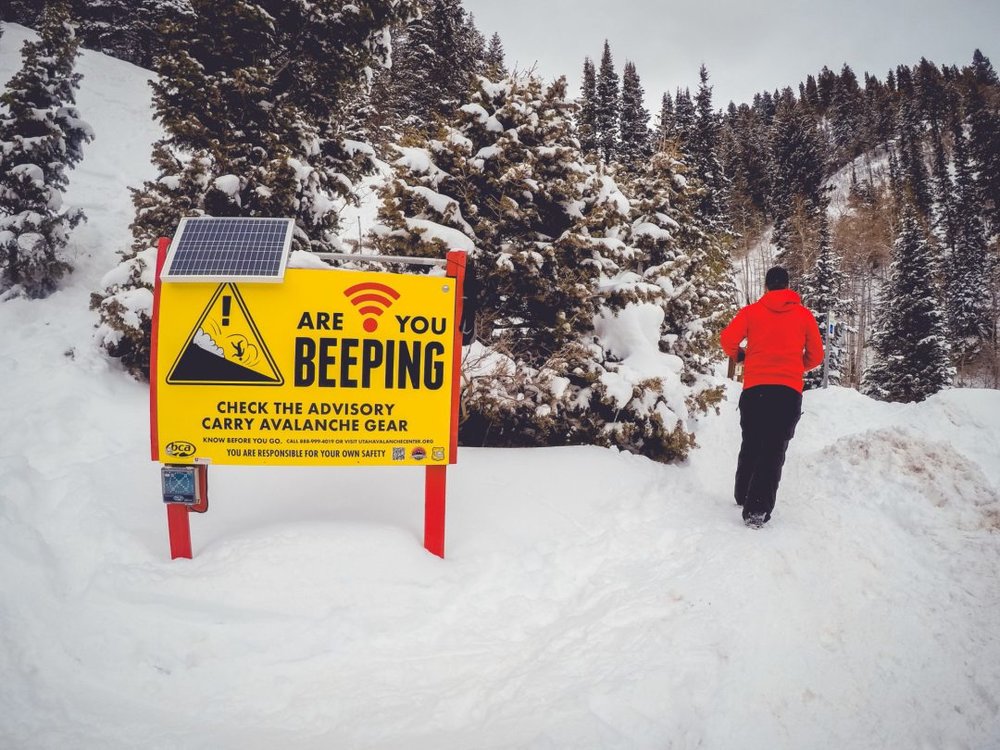
An open sign at one of the backcountry gates at the top of the Strawberry Gondola at Snowbasin Resort in Utah. No one on that hill has avalanche gear.
Lack of avalanche education and feeling ‘safe’ near resort boundaries
The signs at many backcountry gates say, “YOU CAN DIE”. Some say, “Are you beeping?” and have the technology installed at the sign so you can check that your beacon is working. But, all too often, as it was on that morning in Park City, the party next to me had no beacons. No avalanche education or avy gear. Just the confidence from their friends that they would arrive at the bottom safely.
With a backcountry gate or a ski boundary sign so close to the ski resort trails, it somehow seems safe. But this is far from the truth! These areas are indeed backcountry and certainly not for novices or those without avalanche gear. Yet we go anyway.
Overlooking Safety in Favor of Adventure
On one ski trip, a friend suggested we should scoot out the backcountry gates at the top of Vail Mountain in Colorado and head for the Minturn Mile. This route gives you backcountry access and finishes with a toboggan-like chute into the old mining town of Minturn.
So we went. How convenient that our last run of the day dropped into fresh powder and finished almost thirty minutes later at the famous Minturn Saloon, where you can grab a beer with friends and share the stoke of your epic adventure. The Midturn Mile is a great way to end the day, but we were exhausted. Had there been an avalanche, no one in my party was prepared.
We got lucky that day and many other days that followed. So I finally decided to take an avalanche safety course to become more familiar with avalanche terrain and how to best prepare. These recommendations are based on my notes from an American Avalanche Institute Avy 1 Class, along with a Know Before You Go presentation by the Utah Avalanche Center.
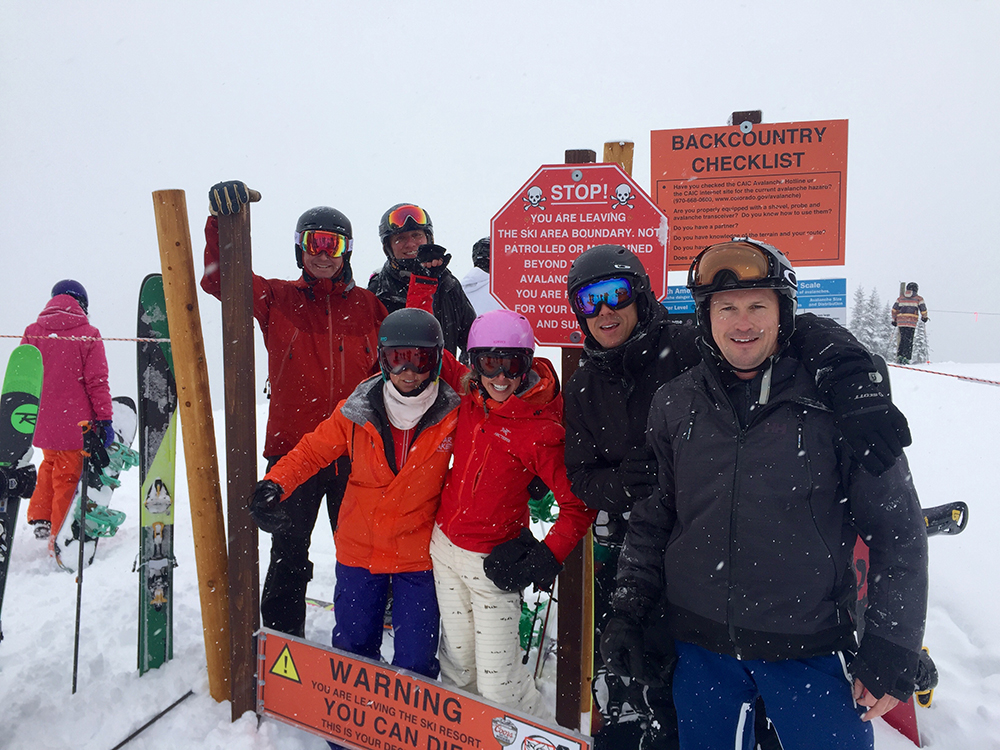
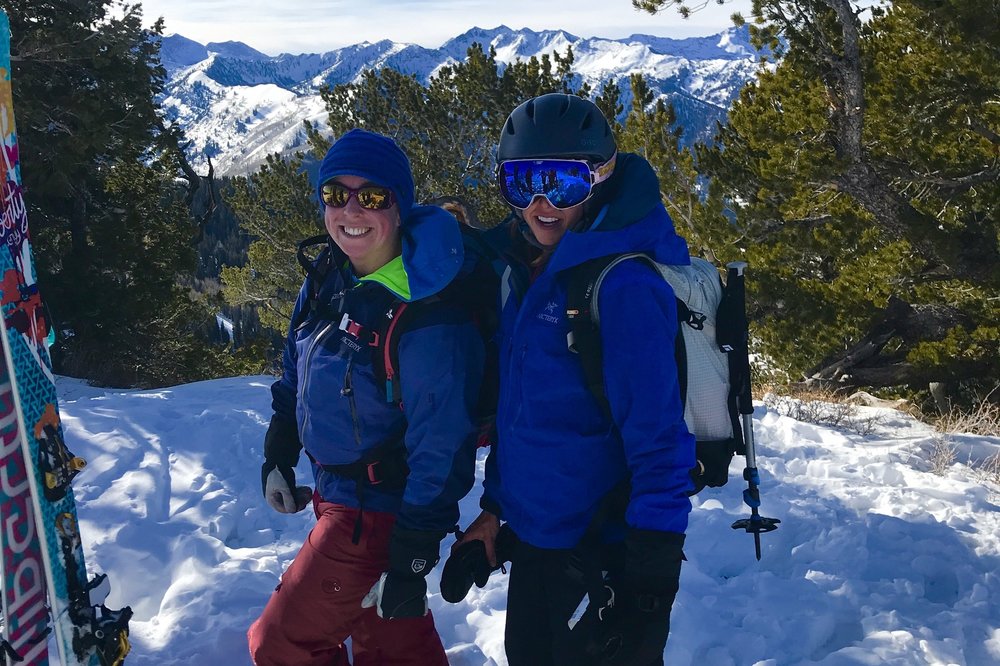
Heading out the backcountry gate at Vail, Colorado. All smiles, but not a single one of us with avalanche gear.
Avalanche Education Safety Tips
1. Get Avalanche Education Training
One of the first things you will learn when you start your avalanche education journey is how avalanches happen and why. Avalanches can occur on ski slopes that have a slope angle of 30-45°. This means the snow can slide without warning at these slope angles when loaded with new snow.
As an example, a slope angle of 30-45° includes blues and black diamond slopes in a resort. However, slopes that are typically ‘green runs’ might be underneath a steeper slope that has the potential to slide. In a resort, ski patrol and other team members manage the avalanche danger, often called avalanche mitigation work so that an area is safe to ski. In the backcountry, even just outside the backcountry gates, no one manages the avalanche danger.
Other problems you may run into, literally, are terrain traps. Here are the most common terrain traps:
- trees/tree wells
- a gully/canyon
- rocks/cliffs
- stream/river crossing
A terrain trap can increase the consequences if you are caught in an avalanche in that area. All this information barely scratches the surface of what you would learn if you took an avalanche education class.
Avalanche Training Classes
With lots to think about on how to manage our avalanche risk while skiing or snowboarding, we picked up some books. Then we watched a few videos. There’s so much you can learn, at no cost, that will help you prepare for skiing or snowboarding in avalanche terrain. Check out Avalanche.org or the Utah Avalanche Center for more FREE information and online tutorials.
Avalanche Education Books
Here are all the avalanche books we’ve purchased:
- Avalanche Essentials by Bruce Tremper
- Snow Sense by Jill Fredston
- Staying Alive in Avalanche Terrain by Bruce Tremper
- The Avalanche Handbook
After reading and researching, we signed up for an avalanche education class: The American Avalanche Institute’s Avalanche Level 1 Course, often called Avy 1. We recommend taking an Avy 1 class AFTER you’ve read at least one of these books above, had your avy and ski touring gear for a few weeks, AND have practiced with both extensively. If you show up to the class with rental touring skis and have never put your skins on before or used your avalanche gear, you’re in for a rough few days.
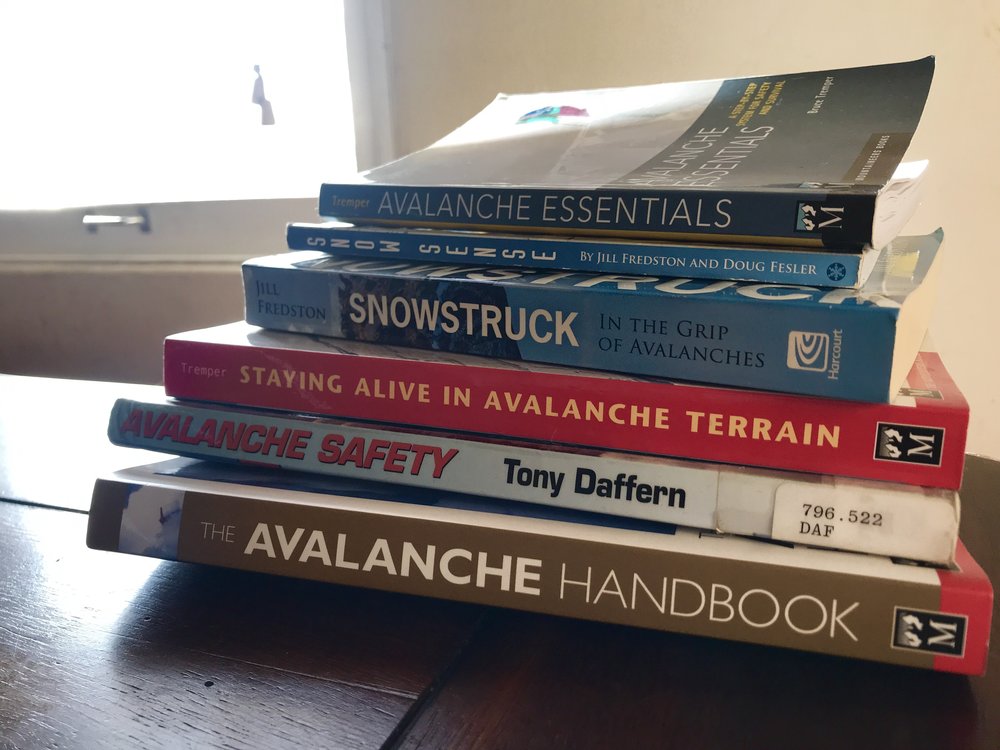
Recommended avalanche education reading for those who venture out the backcountry gates or intend to do more backcountry travel this season.
2. Get Avalanche Safety Gear
Ski and snowboard shops may be able to sell you backcountry skis or a splitboard, however, they may not carry your basic avy gear- a beacon or transceiver, shovel, and probe. I always think this is insane!
If you only buy one item, consider an avalanche beacon or transceiver. This allows people like ski patrollers and a rescue team to find you more easily if you get buried. It also works in the opposite way, allowing you to locate others who might be buried in an avalanche around you.
Keep in mind if an avalanche occurs, you want to have other items with you to help you and your party make it to safety, or survive long enough for help to arrive. We also carry the following:
- Headlamp
- Adventure Medical Kit
- Two-way radios
- Emergency blanket and extra puffy jacket
- Water bottle, snacks, beanie, buff, and glove liners
We’ve found it’s good to have one pack to keep all your avalanche safety gear in. Then you never forget anything on your way out the door.
Always travel with a buddy, and have a plan when you head out of those backcountry gates!
3. Does Your Avalanche Safety Gear Work For You?
Based on that list above, you want to make sure you can comfortably carry all of your avalanche gear on powder days. Try skiing with a pack next time you’re heading to the resort. Getting on and off the lifts becomes a bit more complicated, and your balance is challenged, especially on a snowboard!
If you can get to an REI or a shop that carries avalanche gear, try before you buy, especially the beacon, to make sure it will work for you. For example, a super-lightweight shovel is great, but if you can’t actually shovel snow efficiently, don’t buy it.
It wasn’t until after our avalanche education class that we realized what gear actually worked best for us under stormy snowy conditions. If you can test it beforehand, this will save you some money, and extra trips to REI or purchases on Amazon.com or Backcountry.com.
4. Practice Your Avalanche Education With Your Backcountry Gear
We can’t stress this one enough. Within minutes of our first time out in the field, we realized quickly that it’s very different trying to switch your beacon into search mode or get your skins off your skis when you’re standing on top of a snowy ridgeline with the wind howling!
One of the best tips we ever got when traveling in avalanche terrain is ‘put it on, turn it on.’ This refers to your beacon or transceiver. Whenever you strap your beacon or transceiver on your body, turn it on. Then you’ll never forget when you get to the resort, or to the backcountry trailhead.
Also, try using your avalanche safety gear with the gloves or mittens you’re planning to ski or ride with. I quickly learned that my mittens kept me warm, but I could not operate my beacon with them on. I could barely unzip my backpack! Wearing a lightweight softshell liner underneath the mittens now allows me to take them off easily. And I have those little kid glove loops attached to my gloves so I never lose them!
Lastly, here’s a video from one of our avalanche education classes of how you would practice finding and retrieving a person wearing a beacon or transceiver.
5. Get The Avalanche Forecast for Your Area
Knowing the current and recent conditions in the area you plan on skiing or hiking through is a key step in the Know Before You Go process. Start looking at the forecast to become more familiar with the area.
As we spend most of our time in Utah’s Wasatch Mountains, the Utah Avalanche Center’s app is downloaded to our phones and the website is bookmarked in our browser window. Visit Avalanche.org to find your local avalanche center and then bookmark it. We’ll wait for ya.
Learn how to read the avalanche forecast, and pay attention to avalanche conditions in areas that have the same aspect (the compass direction a slope faces) and slope angle as the place you may be heading. Knowing the forecast will allow you to manage your risk and select a safer place to ski or snowboard.
6. Create a Plan if you will be using the Backcountry Gates
Even if you are simply exiting the backcountry gates at your local resort to score some fresh powder, do the following:
- Ensure Your Beacon is On and Transmitting
- Set an Objective
- Have a Backup Plan
- Go with a Buddy
- Be Okay with not being able to ski a line if the conditions are not in your favor!
This is so key as we are seeing more and more avalanches occur within or near resort boundaries. Here are a few more things to consider in your plans:
Does everyone in your party have avalanche gear and know how to use it?
Do a practice beacon search together outside your rental house or hotel before you go. Make it fun – the one who finds the buried avy pack first gets a beer! Before leaving the parking lot, do a beacon test to ensure everyone in your party can send and receive signals. This is often where you catch if a beacon has low batteries or one that is not functioning properly.
Don’t be swayed by the expert halo!
Choose routes that are well within the capabilities of your entire party. Do not simply take the word of an ‘expert’ that the route or ski line you are attempting is suitable for all. Speaking of parties, you may want to limit your group to 3-4 people or divide a larger group into smaller groups. Keep in mind, 90% of avalanches are triggered by you or someone in your ski party.
Let someone outside of your group know your plans for the day
Having cell service is great, but be prepared to have no contact with the outside world once you set off from the trailhead or go through the backcountry gates. Cell phone batteries may not last as long in the cold, and often being at the bottom of a canyon will block cell service altogether.
Therefore, let someone outside your party know your plan. In addition, having two-way radios might be helpful. As we mentioned earlier, in the event of an avalanche, the people in your party are going to be the ones to rescue you, so pick your backcountry companions wisely.
Trailhead signage reminds you to check that your beacon is on and sending a signal. This sign also allows you to test that beacon signal!
7. Check the Weather and Snow Conditions at the Trailhead or Resort
This means, do the conditions around you match what was forecasted? Have they changed? Do any of these unstable conditions exist:
- recent avalanches
- new snow
- fog
- recent warming
- wind events
- cracking or collapsing snow (that cool ‘thump’ sound isn’t so cool anymore)
8. Perform Avalanche Stability Tests and Dig Snowpits
While the information below might seem like overkill for simply going out backcountry gates, it is essential when heading out from a trailhead to access more remote backcountry terrain.
Perform stability tests on areas with similar slope angle, elevation, and aspect you plan to ski. If you skin up a North-facing open slope, testing along the way, and all signs are good, do you think it’s safe to then ski down the adjacent East-facing slope that’s covered with trees? Although the tree-filled glade may seem like a safe place, you haven’t tested that aspect or slope angle, and trees can be a huge terrain trap!
Dig a snow pit, and perform an extended column test or ECT along the way. Yes, we know it takes time. But, you’d be surprised how many times we dug a pit and got no results, and then dug another pit a few dozen feet higher, or on a different slope angle or aspect, and got full propagation or collapse. Here’s a video of us performing an ECT:
9. Assess Group Dynamics in the Backcountry and at the Resort
You’ve made a plan, and everyone is on board and prepared. You get to the trailhead or the backcountry gate, your friends are stoked and looking forward to powder. However, a few minutes in, one of the members of your party is falling behind. Someone has a wardrobe malfunction. Another is voicing concerns- “that slope looks much steeper up close. I don’t know about this.”
Pay close attention to group dynamics. Remember, if one person is not feeling comfortable with the agreed descent, identify safer terrain and minimize your exposure to potential avalanche terrain.
Select a leader for your party, BUT ensure everyone in your group has a voice and communicates openly. Don’t simply trust the ‘expert’ because they say it’s safe or have skied it before! It’s not fun to get to the top of a climb and then have to hike all the way back down, but it’s definitely better than pushing someone out of their comfort zone and creating a dangerous situation.
Most of us spend a lot of hard-earned cash on gear, travel, and accommodations to go on that ski trip or reach that backcountry trail. However, we all want to live to ski another day, and we want to keep those friendships for a long time to come.
Communicate often with all those in your backcountry ski party and especially before heading out the backcountry gates!
10. Moving in or Through Avalanche Terrain
There I was, snowboarding down the planned route in the backcountry in Big Cottonwood Canyon and getting into knee-deep powder. I’m stoked, my smile is big, this is what I’ve been waiting for all day! Then I lose my edge and go down.
I spend almost 30 seconds trying to get upright again. I’m starting to breathe heavily. I know the bowl to my left is filled with fresh snow, on an unstable base layer, and can be triggered remotely. I look around for my companions. They are not dropping in to help me! Hello?? I’m over here. What the hell is going on!!
I learned my lesson the hard way. In avalanche terrain, my partners were safer waiting for me to pull myself up and get moving again than to drop in and try to help.
Other tips I learned:
- Practice moving across a slope one at a time, especially in steep and unstable terrain
- Always be watching for signs of unstable terrain
- Be alert and listen for collapsing snow. Leave your headphones at home.
- The slope you might be traversing could be gentle, but what about the terrain right above you?
Lastly, we know you want those selfies with the beautiful mountains in the background, but wait until you’re out of harm’s way to record your Insta story!
Final Thoughts on Avalanche Education
This blog post is by no means a substitute for taking a class. Practice with your own gear and with your backcountry partner. Choose that backcountry partner wisely! Also, keep in mind, that education is an ongoing process.
We want to thank the American Avalanche Institute, including our instructors Mike Ruth, Patrick Reddish, and Cameron Banko, along with the Utah Avalanche Center. They provided us with practical skills and hands-on demonstrations in real-life avalanche conditions, yet all the while keeping us safe.
To read more about Top Rope Media’s adventures, follow us on Instagram, Facebook or Twitter (X). Happy traveling!
– Meredith McConvill, Top Rope Media
I know Becky and Jesse would love this blog, its equipped with free resources that everyone can read and watch at the comfort of their home. I will definitely be planning ahead when I take an adventure.
10 Basic Tips For Avalanche Safety | Top Rope Media
ahtdmwjhrft
htdmwjhrft http://www.g4e5i8t387v09k2o43z83efsx6i1nw5ns.org/
[url=http://www.g4e5i8t387v09k2o43z83efsx6i1nw5ns.org/]uhtdmwjhrft[/url]